 Pin
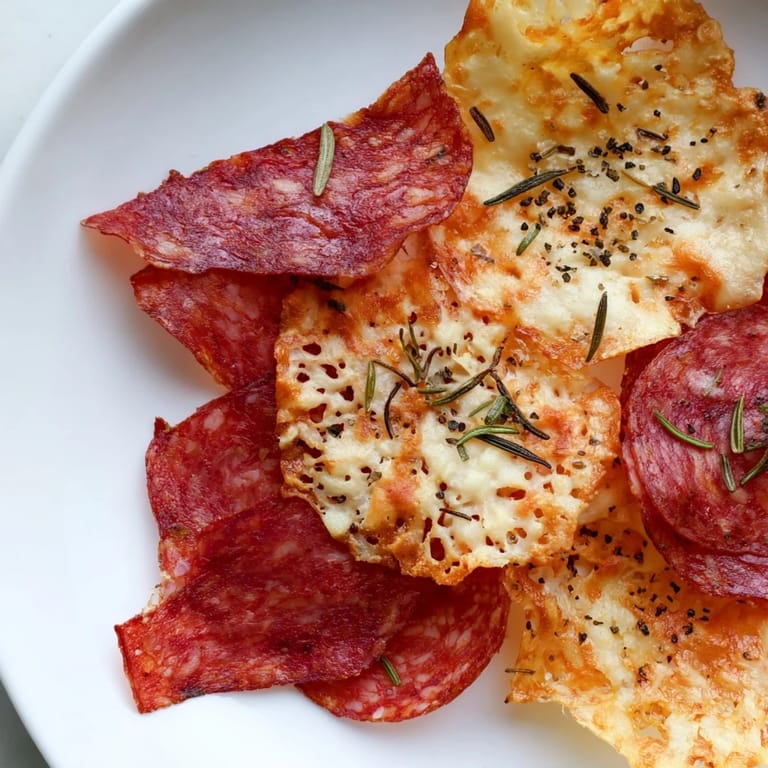
Pin My friend Sarah showed up to game night with a plate of these crackling crisps, and I honestly thought she'd lost her mind at first—meat and cheese, just baked? But one bite changed everything. The way the salami edges curled up golden and the cheese melted into these shattering shards was pure genius. Since then, I've made them for every gathering, and they always disappear first.
I remember standing in my kitchen on a lazy Sunday afternoon, just trying to figure out what to do with the fancy charcuterie board left over from brunch. My partner wandered in asking what smelled so good, and I realized I'd accidentally discovered the perfect way to use up those beautiful cured meats that were sitting there. We couldn't stop eating them straight off the cooling rack.
Ingredients
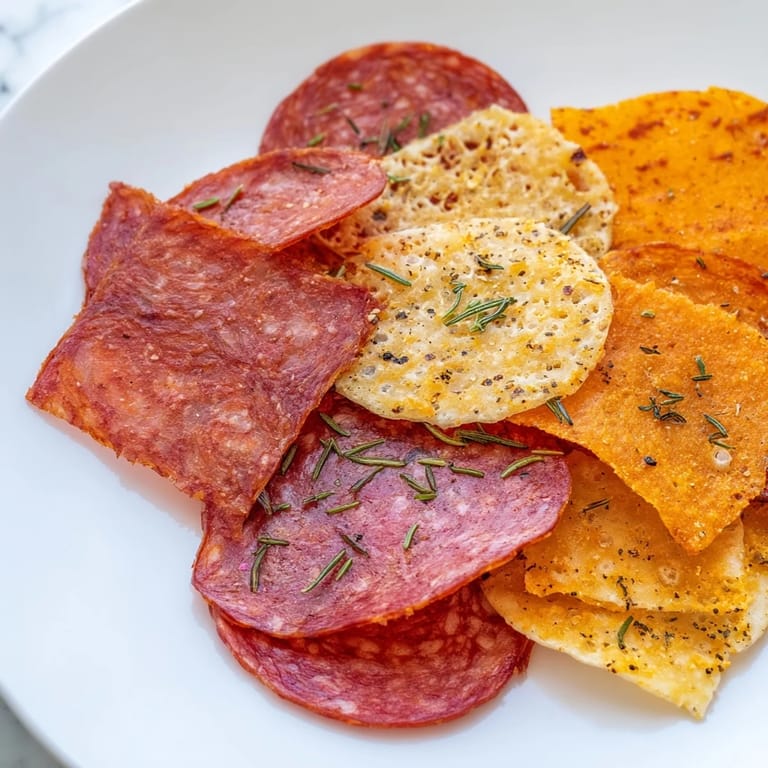
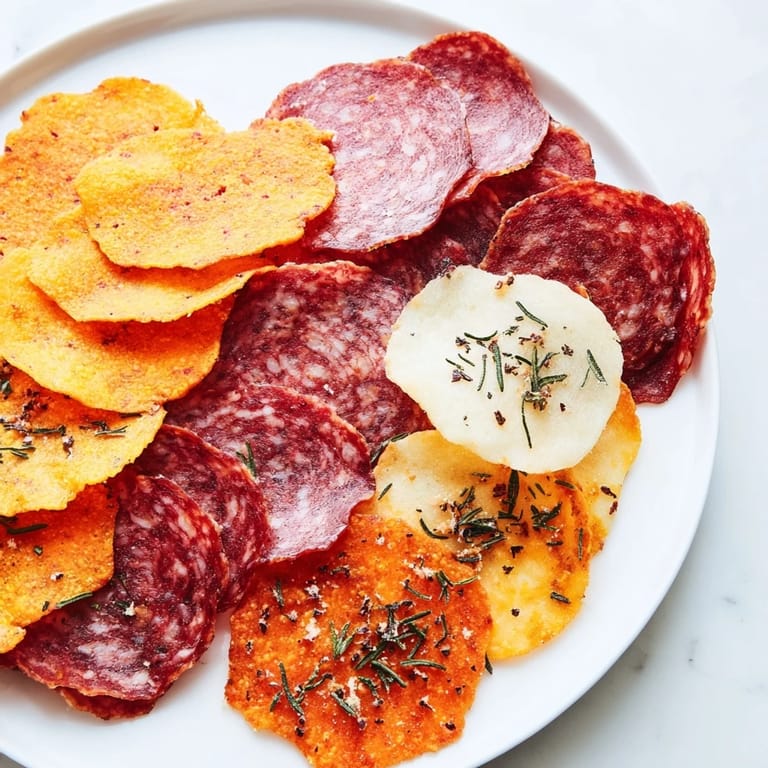
- Thinly sliced salami (100 g): The thinner you get it, the crispier it becomes—ask your deli counter to slice it paper-thin, thinner than you think is reasonable.
- Thinly sliced prosciutto (100 g): This delicate stuff becomes almost translucent when crisped, adding elegance to your platter.
- Thinly sliced pepperoni (100 g): The spice here keeps things interesting, so don't skip it even if you're not usually a pepperoni person.
- Hard cheese like aged cheddar, Manchego, or Parmesan (100 g): These cheeses get shatteringly crisp because they don't have much moisture—buy them as a single slab and slice thick.
- Semi-hard cheese like Gouda or provolone (100 g): These ones get bubbly and lacy, creating texture variation that makes the whole plate more interesting.
- Fresh herbs like thyme or rosemary, finely chopped (optional): Sprinkle these on the cheese before baking, but don't overdo it or they'll burn and taste bitter.
- Cracked black pepper (optional): A light hand here—just enough to see the specks.
Tired of Takeout? 🥡
Get 10 meals you can make faster than delivery arrives. Seriously.
One email. No spam. Unsubscribe anytime.
Instructions
- Prepare your stage:
- Get your oven to 375°F and line two separate baking sheets with parchment paper. Separation is key here because meats and cheeses need different timing, and you'll thank yourself for not scrambling halfway through.
- Layer the cured meats:
- Arrange your salami, prosciutto, and pepperoni in a single layer on the first sheet, making sure none of the pieces overlap. If they stack on each other, some bits stay chewy while others burn.
- Arrange the cheeses:
- Space your cheese slices out on the second sheet with a little room between each one. They're going to bubble and spread, and crowding them means melted cheese gluing everything together.
- Add your finishing touches:
- If you're using herbs or pepper, sprinkle them over the cheese now—a light dusting, not a blizzard. This is your moment to taste ahead.
- Bake the meats:
- Into the oven goes your meat sheet for 8 to 10 minutes. You're looking for edges that are crisp and just barely golden, not dark brown. Pull them out when they look like they're done because they keep crisping as they cool.
- Bake the cheeses:
- Your cheese goes in for 6 to 8 minutes—watch for that golden, bubbling moment when it looks like an edible lace doily. Too long and it goes from crispy to burnt, so check at the lower end of the timing first.
- Cool with patience:
- Let the meats cool completely on the sheet before touching them. For cheese, give it five minutes on the hot pan, then use a thin metal spatula to gently peel each crisp away from the parchment.
- Bring it all together:
- Arrange everything on a platter and serve while they still have a bit of warmth. They're best eaten within an hour, so time your baking to match when people will actually eat them.
 Pin
Pin The best part happened when my mom tried one of these at a family dinner and immediately asked for the recipe, except she wanted to make them with sopressata and aged Gruyère instead. Suddenly we weren't just sharing food, we were trading flavor ideas like we were in some underground cheese society. It's one of those rare moments when the simplest recipes become conversation starters.
The Magic of High Heat and Thin Slices
What makes these work is dehydration meeting fat. When you expose thin slices of cured meat and cheese to dry heat, all the moisture evaporates, leaving behind just the flavor and the fat, which then crisps everything up. It's almost too simple to work, which is probably why it caught everyone off guard the first time around. Thicker slices would never achieve that shatter factor, so don't try to save prep time by using thicker cuts.
Timing Is Everything
Your oven probably runs a few degrees hotter or cooler than advertised, so treat the timing as a guide rather than gospel. I started checking my cheese at five and a half minutes because my oven runs hot, and now I never have surprises. The moment you see that golden bubbling on the cheese, you've hit the window—pull it out and don't second-guess yourself.
Mix and Match Flavor Combinations
Once you understand the basic technique, you can play. Smoked meats add depth, and a tiny pinch of smoked paprika on the cheese before baking brings in something special. I've experimented with everything from hot salami to aged gouda blends, and the formula never fails.
- Try different cured meats like soppressata, spicy coppa, or even quality cold cuts if you're feeling adventurous.
- Pair hard cheeses with herbs that match the meat's flavor profile—rosemary with smoky meats, thyme with everything.
- A light dust of paprika or cayenne on the cheese just before baking adds a flavor dimension that guests always ask about.
 Pin
Pin These chips turned into my secret weapon for looking impressive without the stress. They're proof that sometimes the best food comes from happy accidents and thin slices.
Recipe FAQ
- → What meats work best for charcuterie chips?
Thinly sliced cured meats such as salami, prosciutto, and pepperoni are ideal due to their fat content, which crisps nicely when baked.
- → Which cheeses crisp well when baked?
Hard cheeses like aged cheddar, Manchego, Parmesan, and semi-hard cheeses such as Gouda or provolone achieve a golden, crispy texture.
- → How do I prevent the chips from sticking to the pan?
Line baking sheets with parchment paper and space slices apart to avoid sticking and promote even crisping.
- → Can I add flavors to the chips before baking?
Yes, sprinkling fresh herbs like thyme or rosemary, or adding cracked black pepper enhances the flavor without overpowering the natural taste.
- → How should I store leftover chips?
Keep leftovers in an airtight container at room temperature for up to two days to maintain crispness.
- → Are charcuterie chips suitable for low-carb diets?
Absolutely, these chips are naturally low in carbohydrates, making them a perfect snack choice for low-carb and gluten-free eating plans.