 Pin
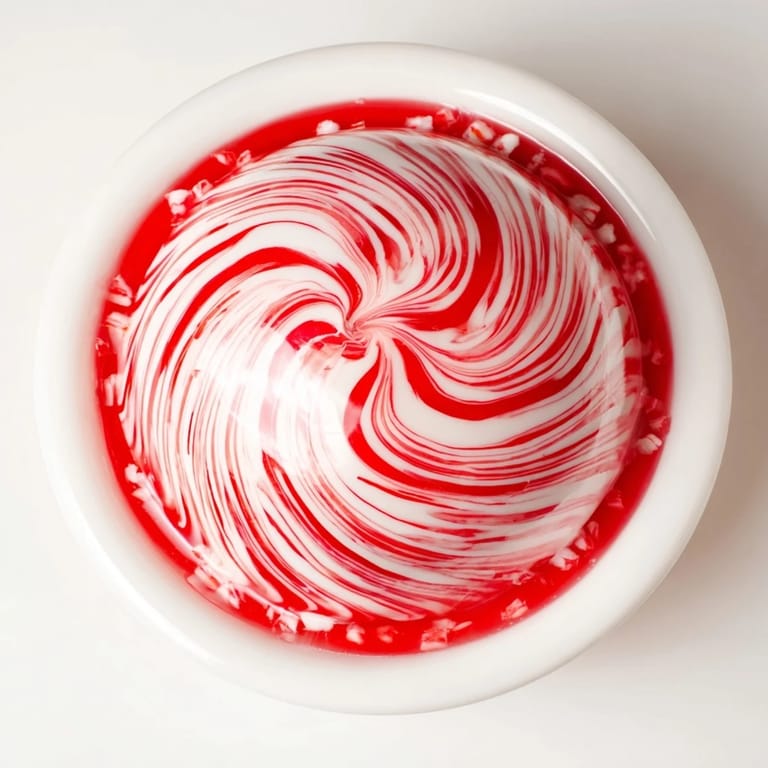
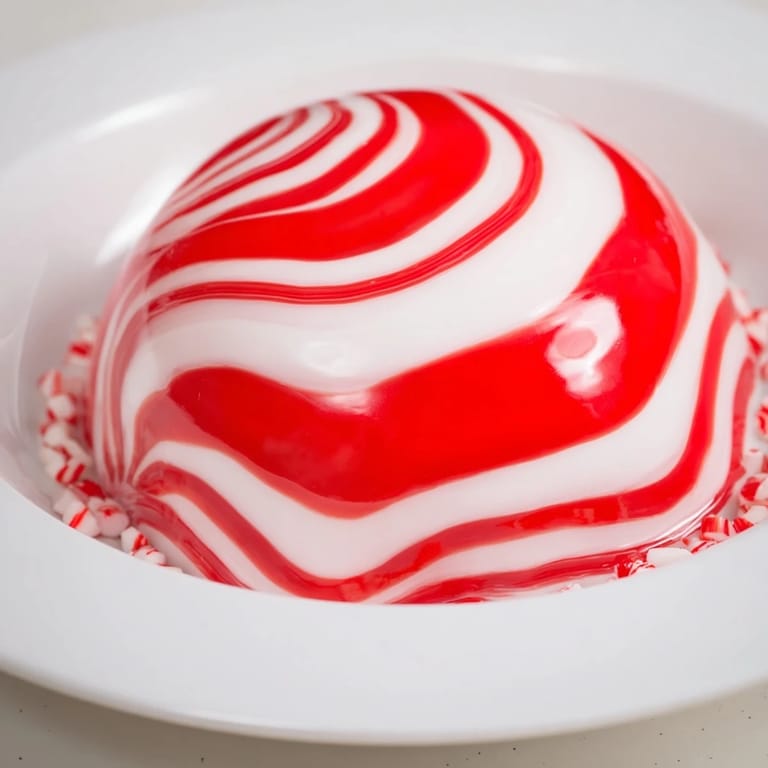
Pin A festive and edible holiday bowl made entirely from peppermint candies—perfect for serving treats or gifting goodies, with no baking required.
My family was amazed the first time I made this peppermint candy bowl for our holiday party. Kids and adults alike couldn't believe it was edible, and it quickly became our favorite way to serve wrapped chocolates every year.
Ingredients
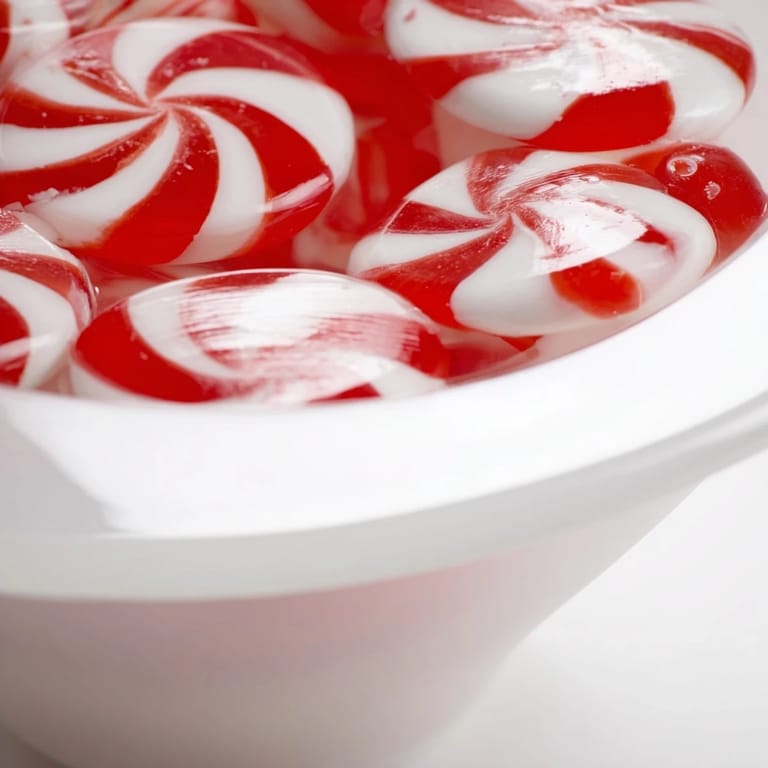
- Peppermint hard candies: 30–36 round, unwrapped
Tired of Takeout? 🥡
Get 10 meals you can make faster than delivery arrives. Seriously.
One email. No spam. Unsubscribe anytime.
Instructions
- Prepare Oven:
- Preheat your oven to 300°F (150°C).
- Set Up Baking Sheet:
- Line a baking sheet with parchment paper or a silicone baking mat.
- Arrange Candies:
- Place candies in a tightly packed circle, forming a disc about 8–9 inches in diameter. Edges should touch with no gaps.
- Bake:
- Bake for 7–9 minutes, watching carefully so they melt together but do not brown.
- Cool Slightly:
- Let cool for 1 minute, until candies are pliable but safe to handle using oven mitts/gloves.
- Shape Bowl:
- Invert a 6-inch heatproof bowl. Lift melted candy disc with parchment, drape over the bowl and gently press sides to shape.
- Set & Finish:
- Hold for a few seconds, then let cool completely for 20 minutes. Remove mold and peel away parchment. Fill as desired.
 Pin
Pin This bowl always brings out a sense of holiday wonder in our house—everyone loves choosing their favorite wrapped candies and sharing stories while reaching into the edible centerpiece.
Required Tools
Baking sheet, parchment paper or silicone baking mat, oven, heatproof mixing bowl, oven mitts or gloves are all you need to make this magical treat holder at home.
Allergen Information
No top 8 allergens if candies are verified gluten- and nut-free; always check packaging for cross-contamination warnings.
Nutritional Information
One serving (about 1/8th of bowl): 65 calories, 0g fat, 17g carbohydrates, 0g protein.
 Pin
Pin Create a memorable gift or centerpiece with this easy project—it's sure to delight everyone and makes cleanup a breeze!
Recipe FAQ
- → What type of candies work best for shaping the bowl?
Round peppermint hard candies are ideal because they melt evenly and fuse well without browning or burning.
- → Can the bowl be made using colored candies?
Yes, alternating red and green peppermint candies or mixing fruit-flavored hard candies adds a decorative touch.
- → How do I shape the melted candy into a bowl?
Once pliable, invert a heatproof bowl and carefully drape the warm candy disc over it, pressing gently to conform to the shape as it cools.
- → What precautions should I take when handling melted candies?
Use oven mitts or heat-resistant gloves as the melted candy is hot and sticky. Handle carefully to avoid burns.
- → How should I store the finished peppermint bowl?
Keep it in a cool, dry place away from humidity to prevent stickiness and maintain its shape and texture.
- → Are there any allergens in this peppermint bowl?
The peppermint candies used typically contain no major allergens, but always check packaging for cross-contamination warnings.