 Pin
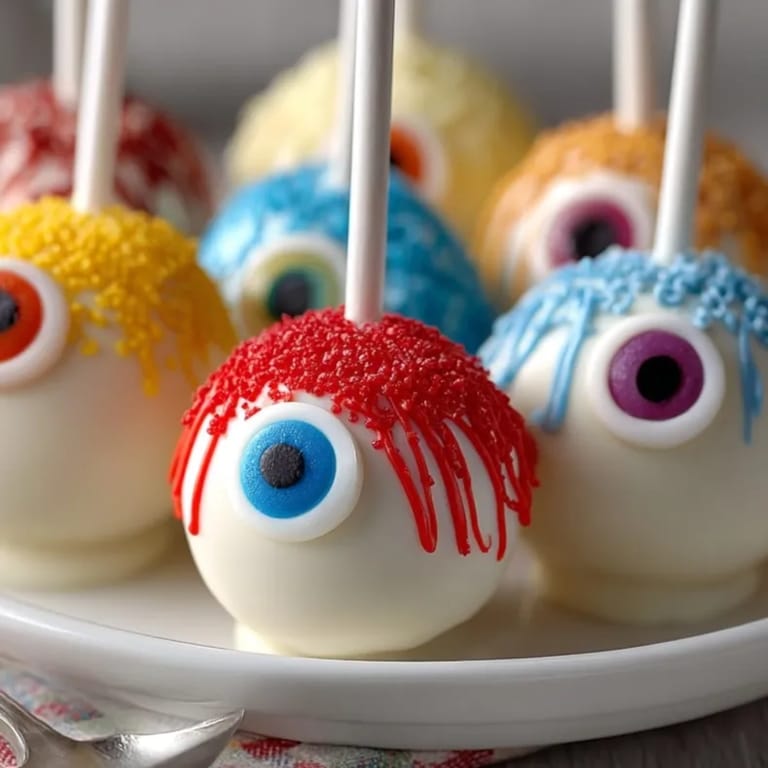
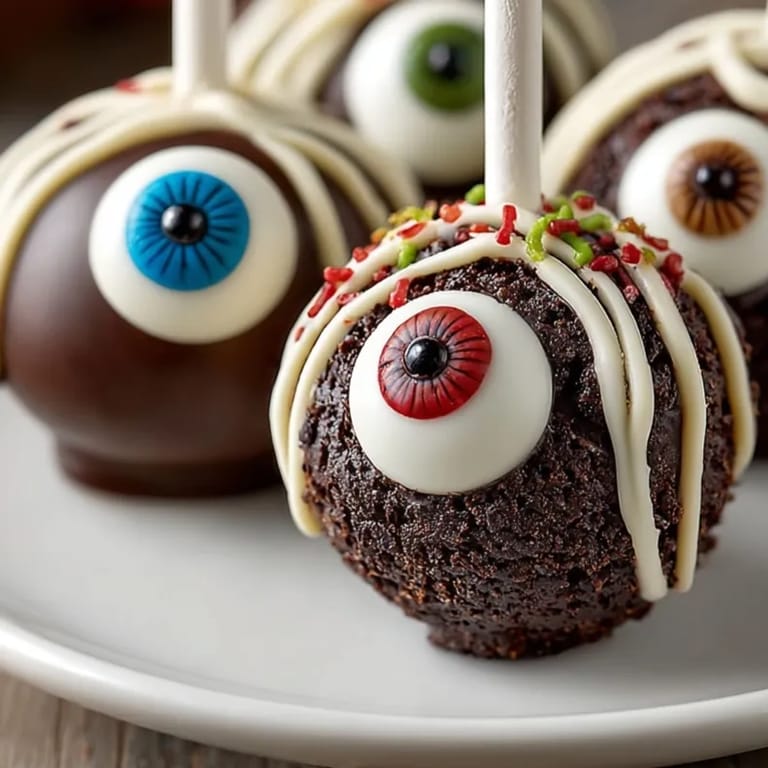
Pin Devil's Food Cake Pop Eyeballs are my go-to Halloween treat when I need something that's as eye-catching as it is delicious. These bites of chocolate cake wrapped in creamy frosting and decorated like spooky eyeballs are the perfect party centerpiece. Young kids love helping decorate them and adults find them irresistible.
I started making these cake pop eyeballs after my niece begged for Halloween-themed treats and now they make an appearance every year on our dessert table. The playful process brings everyone together in the kitchen and the end result never lasts long.
Ingredients
- All-purpose flour: gives the base structure look for fine milling to avoid clumps
- Unsweetened cocoa powder: brings deep chocolate flavor Dutch-process is best for color and richness
- Granulated sugar: for sweetness use fresh sugar to prevent lumps
- Unsalted butter: adds moisture and richness ensure it's soft for smooth blending
- Large eggs: bind and help the cake rise use at room temperature for easier mixing
- Buttermilk: gives tenderness and a slight tang opt for cultured buttermilk for best texture
- Hot water: activates the cocoa for richer flavor and smoother batter
- Baking soda and baking powder: create lift in the cake check expiration for maximum efficacy
- Salt: balances flavors make sure it's free-flowing for even mixing
- Vanilla extract: for warmth and depth look for pure vanilla
- Prepared cream cheese frosting: binds cake crumbs together and adds creamy tang homemade or store-bought both work
- White candy melts or white chocolate: for smooth coating go for high quality to avoid cracking once set
- Dark chocolate or brown candy melts: make realistic pupils
- Food coloring gel: transforms each pop into unique eyeballs bright gel colors work best
- Edible marker pens or colored candy melts: help sketch out iris designs pick contrasting hues to make pops stand out
- Red decorating gel: creates the bloodshot effect
- Lollipop sticks: hold everything together make sure they're sturdy for easy dipping
Tired of Takeout? 🥡
Get 10 meals you can make faster than delivery arrives. Seriously.
One email. No spam. Unsubscribe anytime.
Instructions
- Make the Cake:
- Cream room-temperature butter with sugar until pale and fluffy. Add eggs one by one, blending slowly. Whisk the dry ingredients then gradually mix into the butter mixture, alternating with buttermilk. Add hot water last and pour into greased and lined cake pan. Bake at 350 degrees Fahrenheit for 25 to 30 minutes.
- Cool and Crumble:
- Let the cake cool completely then pull apart the cooled cake to create fine crumbs. Add cream cheese frosting, mixing gently until the mixture clumps but is not overly sticky.
- Shape and Chill:
- Roll the mixture into one-inch balls and chill in the freezer for twenty minutes.
- Prepare Coating:
- Melt white candy melts or white chocolate in a microwave-safe bowl, stirring frequently.
- Insert Sticks:
- Dip lollipop stick tip in melted chocolate, insert into each cake ball, and chill another ten minutes.
- Dip and Set:
- Submerge each cake ball in melted chocolate, let excess drip off, and set upright to harden.
- Decorate:
- Use food coloring gels, edible markers, or colored candy melts to design each iris and pupil. Apply red decorating gel for bloodshot veins. Let decorations dry before serving.
 Pin
Pin My favorite part of this recipe is the decorating stage watching my family invent wild eyeball designs and adding the final spooky touches. Once my little cousin drew a cat's eye and it became the star of our party's treat table.
Storage Tips
Keep cake pops in a single layer in airtight containers lined with parchment to prevent sticking. If refrigerating allow pops to come to room temperature before serving for soft texture and maximum flavor.
Ingredient Substitutions
Try gluten-free flour blends for a wheat-free version or swap cream cheese frosting for chocolate or vanilla to suit preferences. If candy melts are unavailable use tempered white chocolate though results may vary slightly.
Serving Suggestions
Present pops in a styrofoam pumpkin or on a themed platter for a holiday party. Pair with cider or hot chocolate for a kid-friendly dessert station. These cake pops also fit nicely on cupcake towers for a quirky display.
Cultural Context
Cake pops originated in American dessert shops and quickly became a festive favorite due to their portion control and playfulness. Eyeball designs are especially popular for Halloween but swap colors and details for events like birthday parties or goofy family gatherings.
Seasonal Adaptations
Add pumpkin spice to the batter in October for an autumn twist. Decorate with seasonal candies for Christmas or Valentine's Day. Use pastel gels for springtime parties. Chilling between steps is crucial for clean dipping. Make ahead so the pops set well and decorations dry. Use edible glitter for extra sparkle and fun.
Success Stories
Once I made these for my neighborhood's Halloween block party and they disappeared even faster than expected. Kids giggled at the bloodshot eyes and adults couldn't resist the classic chocolate flavor.
Freezer Meal Conversion
Wrap pops tightly in plastic wrap then store in freezer containers. Thaw individually in the fridge overnight or on the counter for two hours to prevent condensation on the coating.
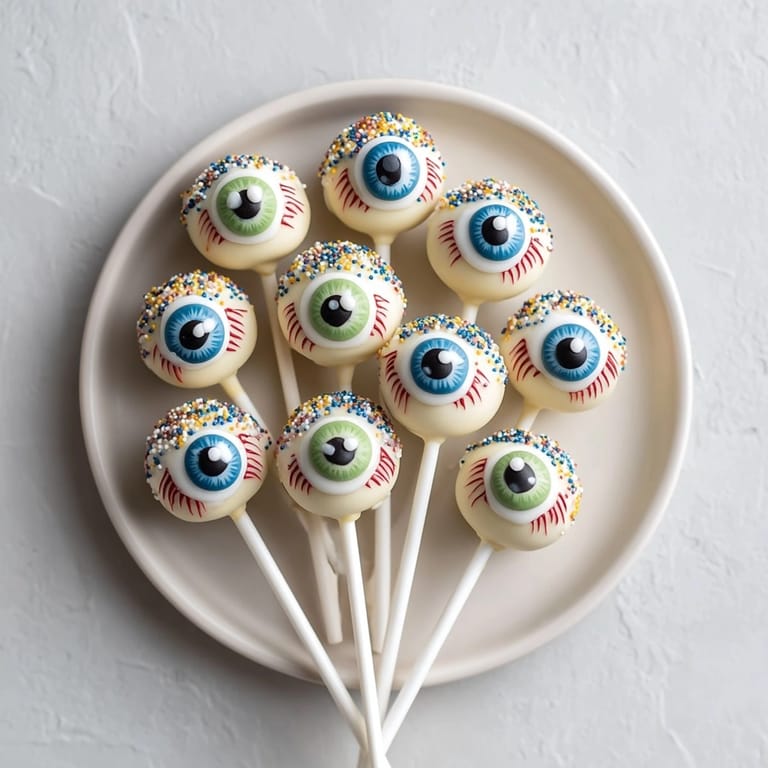 Pin
Pin These cake pop eyeballs deliver both chocolatey goodness and Halloween whimsy. For extra fun serve with spooky drinks and let everyone design their own!
Recipe FAQ
- → How do I keep cake pops from falling off the sticks?
Dip lollipop stick tips into melted chocolate before inserting. Chill pops to help set and secure them firmly.
- → Can I use different frostings for binding?
Yes, chocolate or vanilla frosting works well. Adjust for taste and texture according to preference.
- → What’s the best way to create realistic eyeball decorations?
Use colored candy melts, edible markers for the iris and pupil, and red decorating gel for the bloodshot look.
- → How far ahead can I make cake pops?
Store pops in an airtight container at room temperature for up to 3 days or refrigerate for up to a week.
- → Are these treats suitable for vegetarian diets?
Yes, all ingredients in this version are vegetarian. Always confirm with store-bought items or custom decorations.